I have got mine printing fairly well now....here is a few tips for those that are just getting one.....
Put washers on all the screws...there is plenty in the bag but they don't tell you in the instructions.
Leave the belts long...do not cut them until it is all together and your sure you understand where they have to go...leave some extra on them...
The right side of the X axis assembly....place the brass threaded piece at the top of the bracket...not the bottom where they show you..it will improve your quality and there is holes for it already...if you find a way to do the left side...do it also
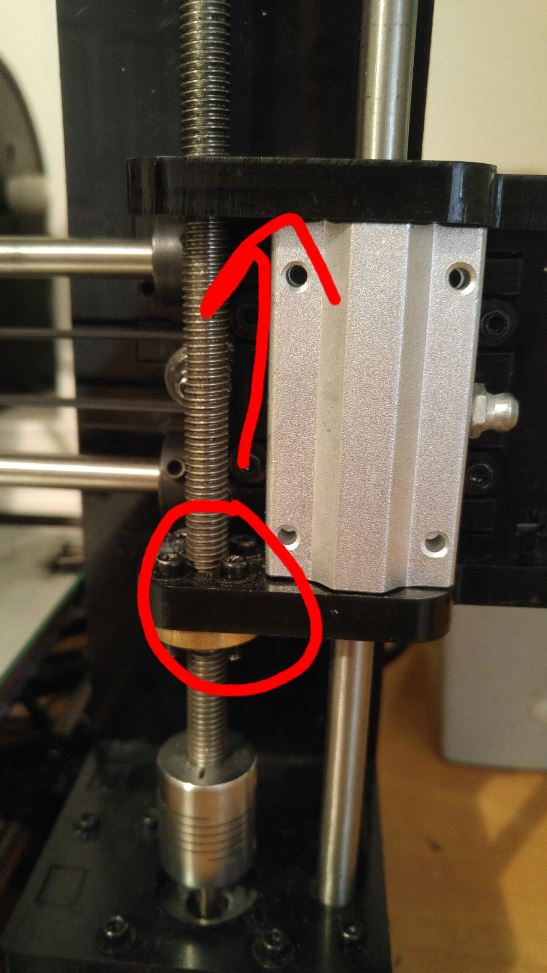
- Move this up
- brass.jpg (77.75 KiB) Viewed 73806 times
Place a piece of insulation between the acrylic platform base and the heating pad.....speeds up heating time and gives more uniform heated area...I used a piece from my garage door insulation kit...
I went to Ace Hardware and purchased 2 lock rings...like the ones on the Z axis smooth rod, also bought 4 nylon washers....place them on the threaded rods but above the top frame piece so the 2 washers are on the frame and the lock ring sets on them...lock it on the ring so it takes all the weight off the Z axis motors...then finish assembly as directed below...
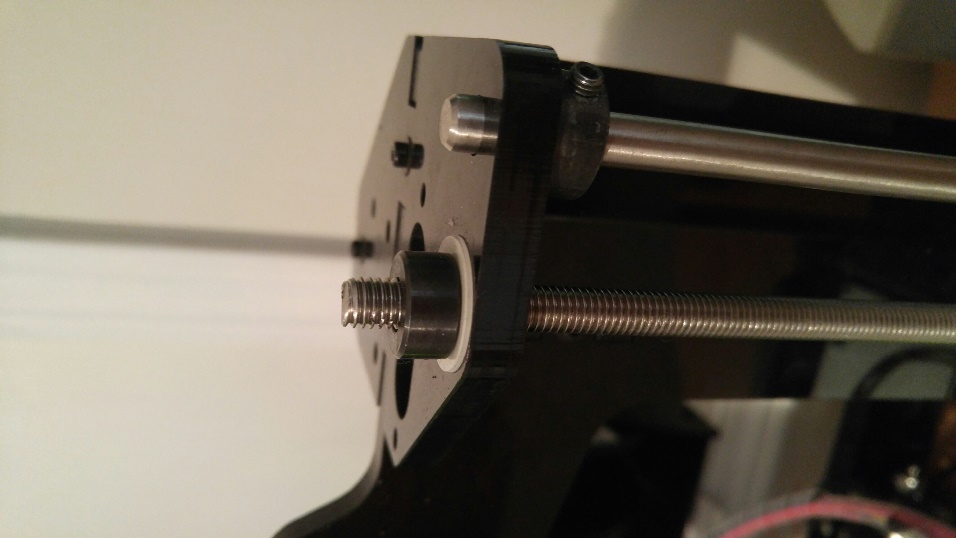
- Z rod support
- 1229151023_resized.jpg (105.71 KiB) Viewed 73806 times
Do not try to use the flat side of the Z axis motor shaft and the flex coupler...it will never line up....take time here to get the coupler to spin with NO WOBBLE...loosen it..turn it some and try it...do it over and over until you find when it is connected to the threaded rod it does not wobble..I had to file the threaded rod slightly where it goes into the coupler....spend some time here and get it straight...NO WOBBLE..
coupler 1k.jpg
Also....dont bother the 3d printers store with to many questions...after about 5 emails they have stopped responding...I was missing parts and also requesting cad files for broken acrylic parts...got them but have not been able to get spare parts from them....must have bothered them to much
My prints are coming out nice now....
[attachment=0]1229151046a_resized.jpg